Skip to Navigation | Skip to Content

MAT 110 - Digital Imaging 1: Adobe Photoshop

Menu

Project Guidelines


Image Size and Resolution Guidelines

It is important that you make sure you have the right output size and resolution for your projects. The size of an image on your computer screen (which has a fixed dpi) may not match the size that the image will print (which depends on the image size and resolution settings). Images that begin too small cannot be made larger without a loss of quality. This means that you will need to start with source or 'native' images that are large enough (or larger) than your intended output size and resolution. Many images that you might acquire off the web will be too small for print output. Pay attention to the pixel dimensions of all the images you acquire and always keep a copy of original, unaltered 'source' images at their native dimensions in case you need them for future use (because once you throw away pixels, make an image smaller and save, those pixels are gone forever).

By rule of thumb:

  • Most printers produce excellent output from images set at 300 ppi.
  • Fine art and cofee table books might be printed from 300 - 400 ppi.
  • Magazines and Brochures are typically printed from 200 - 300 ppi.
  • About 150 ppi is the minimum resolution for reasonable quality print output; sometimes this can be used for large prints because the difference in print quality is not very noticeable on large pieces when you look at the prints from a distance.
  • Most web images are set to a resolution of 72 ppi. But, for the Web, worry less about the resolution and more about the total pixel dimensions.

See the project details for the size and resolution requirements as they vary from project to project. However, the minimum resolution for any project is 150ppi.

To adjust size/resolution in Photoshop:

  1. Choose IMAGE > IMAGE SIZE
  2. Uncheck RESAMPLE IMAGE, so as not to artificially and accidentally enlarge or reduce the number of pixels you have in your image.
  3. Set the RESOLUTION to 200 or 240 or 300 pixels per inch (as per the assignment details).
  4. Check the width/height in inches of the document size. If it is smaller than your intended output size in any one dimension, your image/document is too small. You will need to find larger source images and/or rescan using a higher resolution setting. If it is larger than your intended output size, you have the option to use a higher resolution or reduce the size.
  5. To reduce the size, check RESAMPLE IMAGE and reset the height or width (with CONSTRAIN PROPORTIONS checked). It's likely that your image may not be exactly at the aspect ratio and/or output size you wish in both dimensions and that's okay, provided is not smaller than you intended in any one dimension. You can use the crop tool and/or IMAGE > CANVAS SIZE to further crop/reduce the size to your intended output dimensions.
  6. When you go to print, be sure you print at the "Actual Size" rather than having the printer "Fit" to the paper size.

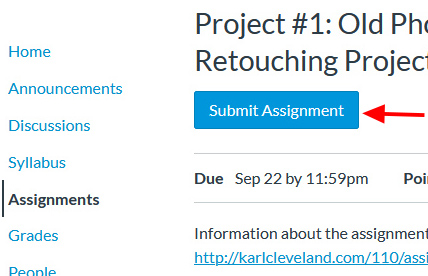
For the Old Photograph Digital Retouching Project, you are required to use a resolution of 200 ppi, with a size of 7 x 5 inches. 7 x 5 inches x 200 ppi means that you'll need 1400 pixels in width and 1000px in height.

> Go to Top

Printing and Mounting Guidelines

All projects (not the exercises) should be printed on high-quality glossy photo paper and mounted on black illustration mat board.

Adhere to the following printing and mounting guidlines:

  1. Print your work on high-quality glossy photo paper. If you do not have a printer at home, the instructor will open the classroom for printing (and help students print) one hour early on the days projects are due. You can also print at FedEx/Kinkos or elsewhere if you do not have your own printer.
  2. Set your printer's options to print on "Best" or "Photo" quality and be sure to set the paper source as "Photo Paper" rather than plain paper. Be sure to print your image at its "actual size" rather than setting it to "fit" to the paper size. Set the paper orientation to portrait or landscape based the orientation of your project/image.
  3. All projects must be mounted on black illustration mat board (Letramax Superblack is good and inexpensive). Do not use foam core or construction paper for mounting. Purchase pre-cut mat boards at 11" x 14" in size from the campus bookstore. Or, cut your own illustration boards to this size. Do not cut the board or your print with scissors. Use a mat knife (or X-Acto knife) with sharp blades and a metal ruler to cut your boards. Many art supply stores will cut the boards for you for about .25 cents per board.
  4. You may use the drymount press in OC4607 to mount your projects to your mat illustration boards (the instructor will demonstrate this). Alternatively, you can use Photo Mount, Spray Mount, or some other fixative or spray adhesive to mount your print to the illustration board. Do not spray fixative in the classroom or indoors! Do not use glue or glue sticks!
  5. Pay attention to your craftsmanship and have a clean and neat presentation. Wash your hands before you start and protect your work from dirt and scratches. Take pride in your work and have fun.
  6. Your Photoshop (.psd) file with your layers intact and a.jpg version must be turned in along with your mounted project. Turn in your .psd, .jpg, and design brief as per the submission guidelines below.

> Go to Top

Assignment Submission Guidelines

In addition to submitting your printed and mounted projects in class (note: exercises do not need to be printed), you will need to submit your digital files (both a .psd and .jpg version). Adhere to the following assignment submssion guidlines:

  1. Use naming conventions for your files so that they are easy to identify. For example, name Project 1 as FirstLastName + -p1 + .psd (ie "karlcleveland-p1.psd"). Then, create a .jpg version of this file using File > Export > Export As and choosing "JPG" as the Format and 80% as the Quality setting.
  2. Submit completed assignments via Canvas. Select the assignment you wish to submit from the "Assignments" listings in Canvas.
  3. Click on the "Submit" button in the assignment details.
  4. Use the "File Upload" option to submit all required assignment files. These at mimimum include your original Photoshop .psd file, a .jpg version of this file, your design brief documentation (required for projects only, not exercises), as a .doc, .docx, .pdf, or .rtf file, and if applicable any supporting/source image files (as .jpg). Use the "Browse" button to find these files on your computer. Use the "Add Another File" link to add additional files for upload. Be sure to add all of the required files and then hit the "Submit Assignment" button.
  5. Only submit fully completed projects via the "Submit Assignment" option. Do not submit drafts or work in progress. (as the instructor will assume that any work submitted is the final piece).

Video review of assignment submssion guidlines:

  1. How to Submit Project #1 and Your Other Projects (12:19)

> Go to Top

Design Brief and Supporting Documentation Guidelines

This course emphasizes conceptual development, critical reflection, and the design process in addition to the technical execution of a project.

In addition to the final artwork, all projects (but not exercises) must include a one-page (two-page maximum) typewritten artist statement or design brief supporting your visual solution that includes: a description your concept, design goals and/or communication objectives; a description of your process and how you utilized appropriate tools to complete the project, achieve stated requirements, and meet your design goals; and a self-evaluation and critical reflection wherein you comment on your project and what you perceive as the strengths and weaknesses of your final output.

If you wish, you can view (and make a copy of) this Google Doc or download and use this Word Doc to use as a guide/template your design brief.

In addition to the design brief, you must include copies (as .jpg) of the reference or composite images used in a project (when applicable). You may also wish to include any research evidence, notes, thumbnail sketches, drafts, comprehensives, etc. that demonstrate your conceptual and creative development process.

Be sure to turn in the Photoshop (.psd) file, a .jpg version of the file, and this design brief documentation (as a .doc, .docx, .pdf, or .rtf file) at the same time via Canvas.

> Go to Top